In this article, we will set up BunnyCDN with your Magento website in just four easy steps.
1. Create a Pull Zone for your website
The first thing to do is create a pull zone for your website where your Magento is installed. Make sure to use the correct protocol that matches exactly your website address, including the HTTP or HTTPS protocol. If you need help creating your zone, you can have a look at our article explaining how to create your first pull zone.

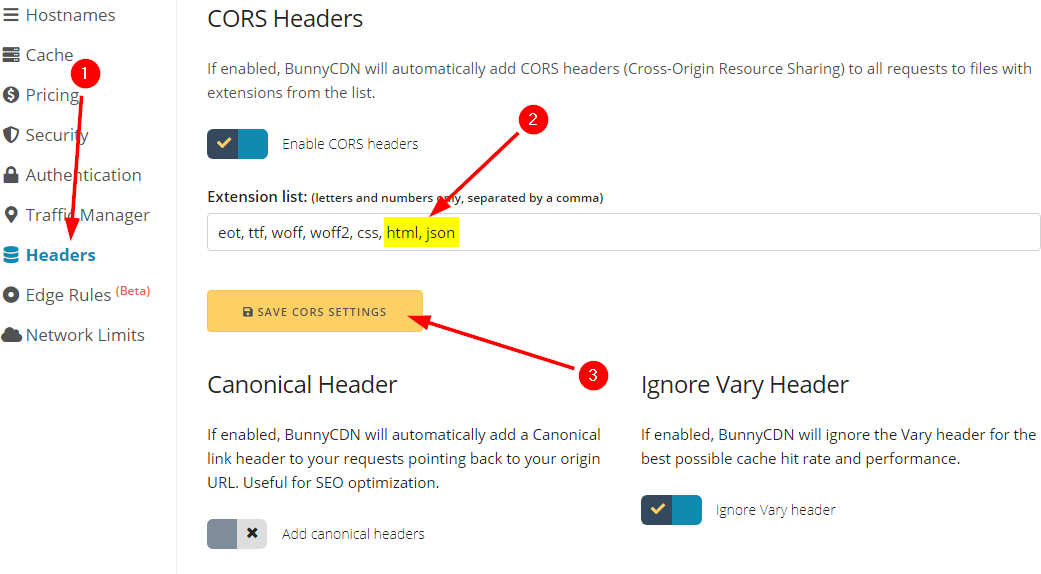
2. Configure your Pull Zone with the correct CORS headers
After you have created your zone, make sure to go to the Headers settings panel and add the html and json extension. This is important as otherwise, your Magento admin interface will not work correctly.
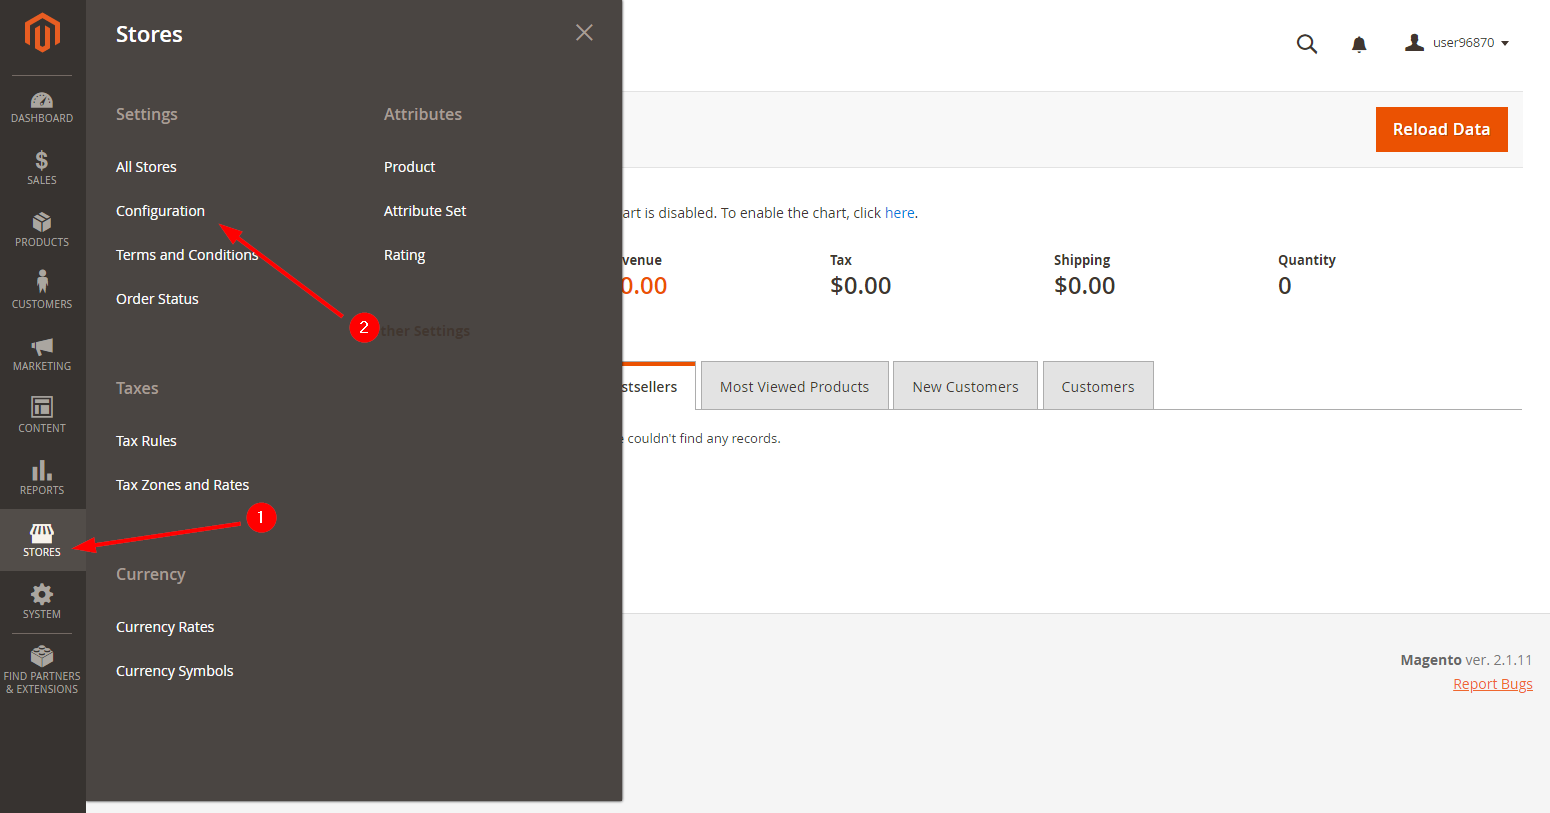
3. Configure Magento to use your created Pull Zone
Next, log in to your Magento admin panel and click on the STORES button and then select Configuration. Next, click on GENERAL and Web menu buttons.
A new configuration panel will open where you now have to select the Base URLs tab and enter your BunnyCDN hostname URL as illustrated below into the Base URL for Static View Files and Base URL for User Media Files. Make sure to include the /static/ and /media/ subfolders into the appropriate fields as highlighted on the example.
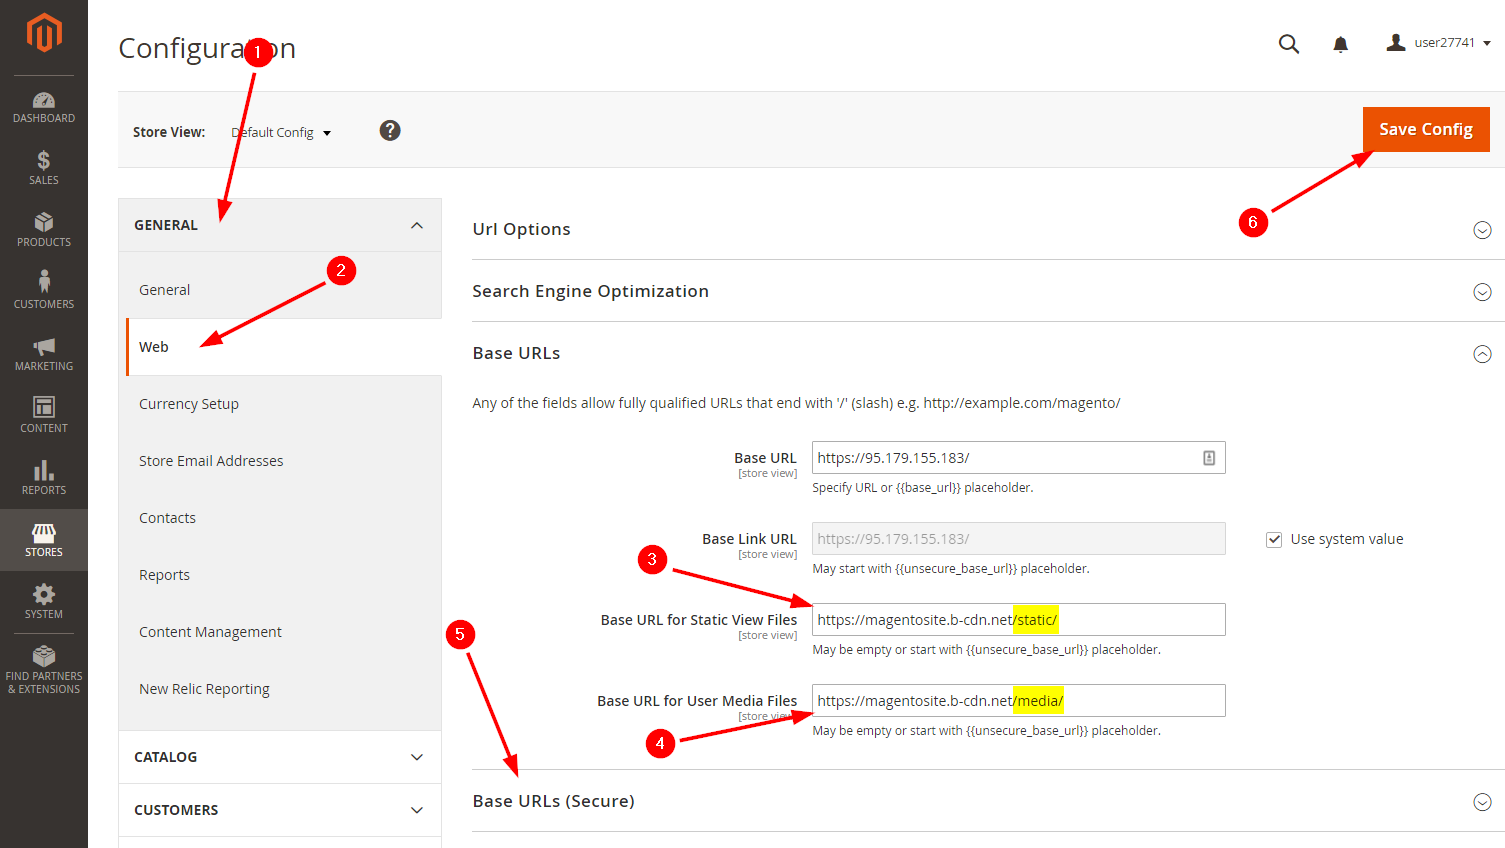
After you set this up, do the same for the Base URLs (Secure) panel and then click on the Save Config button in the top right of the page. Be sure to use the https:// version of the URL here to avoid connectivity issues.
4. Flush your Magento cache
Finally, flush your Magento cache as instructed by the settings dashboard. After this is done, you're all set. Your Magento store is now supercharged by BunnyCDN.
Alert: For Control Panel Help & Tutorials, click here: Panel Tutorials
