Setting up BunnyCDN on your WordPress site is easy. It only takes a few minutes, and can be done in 4 easy steps.
Step 1: Configure your Pull Zone
The first thing you need to do is create your Pull Zone. In order to do this, log into your BunnyCDN dashboard enter the name of your Pull Zone, and specify the URL of your WordPress install as the origin URL. For more information, check our guide here on: How To Create Your First Pull Zone

Step 2: Install the WP Rocket plugin
The next thing to do is to install the WP Rocket plugin. This will enable your WordPress site to use BunnyCDN, as well as the other optimization features that WP Rocket has.
Once you've purchased the plugin, you will receive a Zip file. Follow the installation instructions here to get WP Rocket installed.
Step 3: Configure WP Rocket
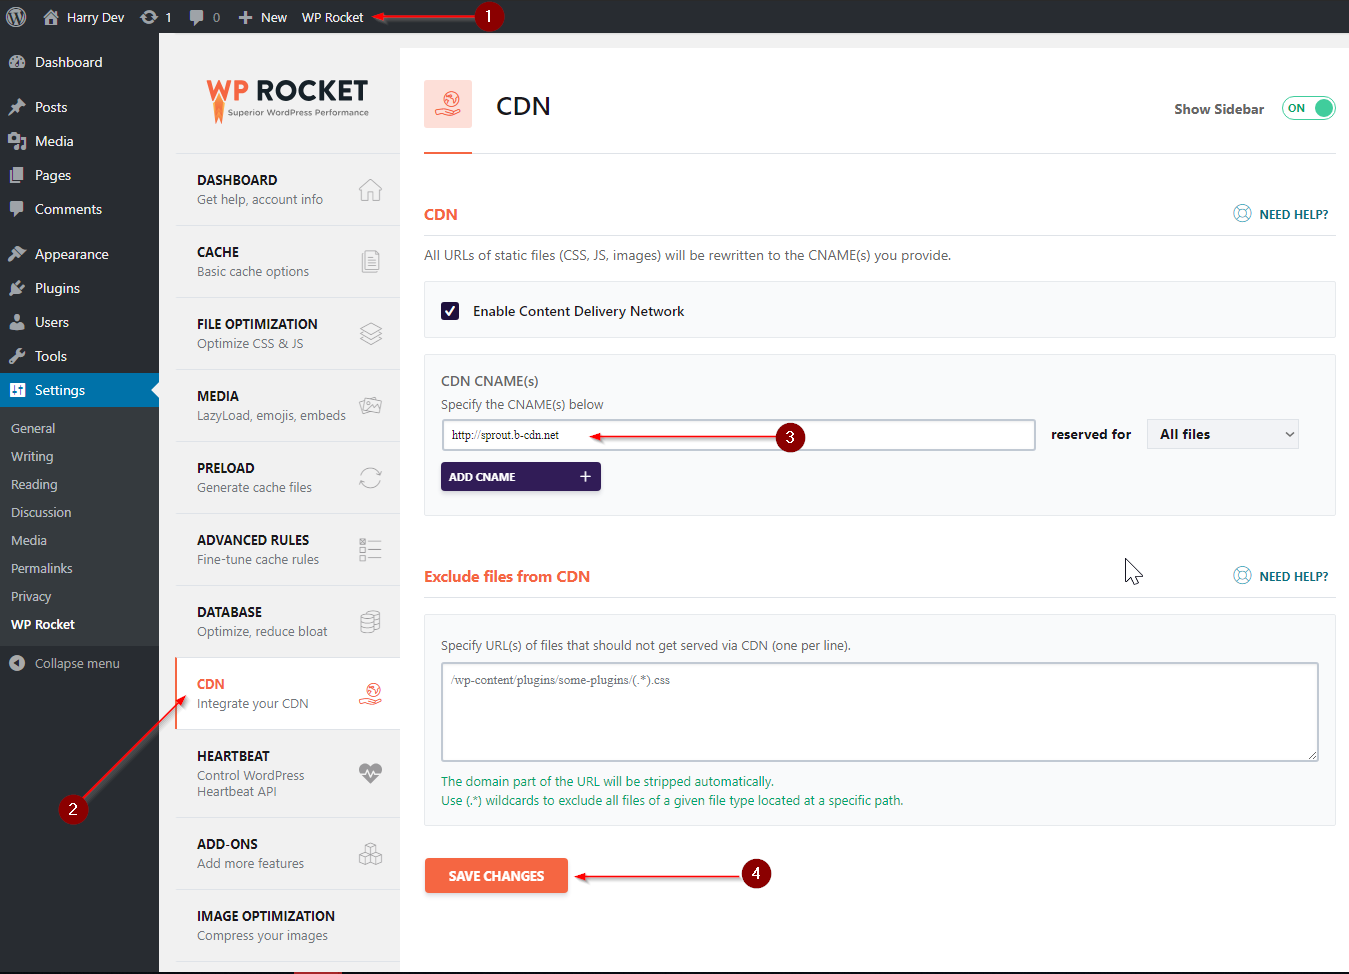
Once you've got WP Rocket installed, you then need to configure it to work with BunnyCDN and your website. In order to do this, click on the new WP Rocket option that will be on the top bar of your WordPress Dashboard (1), and then click on the CDN Settings (2), enter the full hostname of the Pull Zone we setup earlier (including the http/https, depending on what your origin uses) (3) and finally Save your changes (4)
Step 4: Test your WP Rocket CDN Integration
Congratulations, you've successfully configured WP Rocket to work with BunnyCDN on your WordPress website! If you open your site in an Incognito/Private Browsing window and then open up the Sources section of the Developer Mode, you will see that your site is now serving content via the CDN:
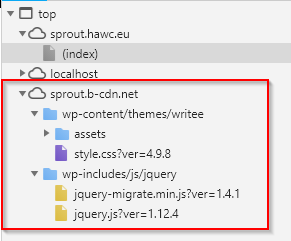
This proves that the CDN is working and the plugin is configured correctly. You will now notice that your site loads a lot quicker, as well as saving tons of bandwidth on your origin server.
Alert: For Control Panel Help & Tutorials, click here: Panel Tutorials
